|
RetroChallenge - Project #2 - Apple //GS
#2 -  APPLE //GS (1986-1992) : various works APPLE //GS (1986-1992) : various works
18. July 2007 |
Project ID: 2.4 Install Applied Engineering GS RAM card |
What I did: |
Apple//GS - 1024 KB of RAM - Gotcha!

I have installed the Applied Engineering GS RAM card - now we have wopping 1024 KB of RAM ! Insanely Great! See some photos below.
Installing the GSRAM or GSRAM Plus Card is easy. Here is how:
- Leave the Apple IIGS plugged in,
but switch the power switch to the OFF position.
- Remove the Apple IIGS cover.
- Discarge any static electricity on your body or clothing by touching the metal case of the computer´s
power supply (on your own risk)
- Remove the GSRAM card from its anti-static bag.
Do not touch the gold edge-connector.
- Position the card over the Memory Expansion Slot with the long end of the card toward the rear of the computer.
- Gently, but firmly, insert the gold edge-connector into the Memory Expansion Slot until it is completely seated.
- Replace the Apple IIGS cover, Installation complete.
Instructions from the original Installation Manual - download here!
The 5.25 Inch Disk ][ Interface is now installed to Slot 6, the recommended slot. (thanks to AppleFreak)
I managed to get my German MouseDesk System D1 booting again and I found that it includes the "Apple IIGS Finder Version 1.0" in English language. See a screenshot, click to enlarge:
ps: nice to see my first name on the Screen 
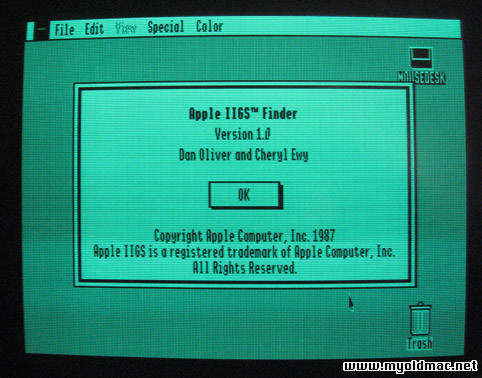
See more photos of my Apple//GS below. |
To do: |
2.3 Transfer data between Mac <-> Apple //GS <-> APPLE IIe |
17. July 2007 |
Project ID: 2.4 Install Applied Engineering GS RAM card |
What I did: |
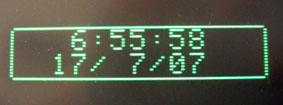
Battery works :-) No 2K error.
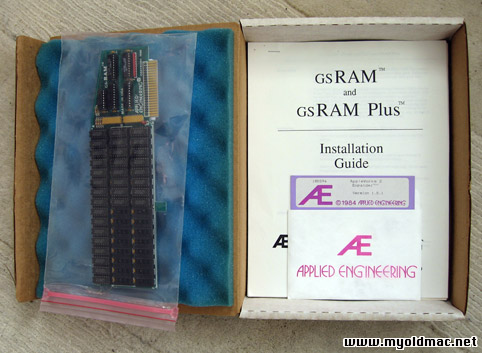
I got my Applied Engineering GS RAM card today :-)
this eve´ I install it. Click the picture to enlarge.
|
To do: |
2.4 Install Applied Engineering GS RAM card
2.3 Transfer data between Mac <-> Apple //GS <-> APPLE IIe |
15. July 2007 |
Project ID: 2.2 Solder a new PRAM battery on the logic board |
What I did: |
I have soldered a new PRAM battery on the board and it works reliable :-)
How to solder a new RAM battery on a ROM01 AppleIIGS ?
You need a special 3,6 Volt 1/2 AA battery with extended metal ends. For instructions see the photos below.
If you don´t like to solder on your Apple//GS board - here is another good solution: GSE´s ROM0/1 IIgs Battery Pack
Thanks to Forum Member Applefreak for the link.
 I found a jumper on the original Apple//GS RAM card - does anyone know for what this is needed for - installed RAM size ? I found a jumper on the original Apple//GS RAM card - does anyone know for what this is needed for - installed RAM size ?
Leave a comment |
To do: |
2.3 Transfer data between Mac <-> Apple //GS <-> APPLE IIe |
09. July 2007 |
Project ID: 2.1 Connect an Apple Disk ][ Drive to the //GS |
What I did: |
I have installed a Disk ][ Drive Interface Card to my Apple //GS to check its booting habits. The problem with the 3.5 Drive seems to result of an empty PRAM battery. The next project is to get my solder iron out of the basement and solder a new battery to the logic board (v ROM01)
How to connect an Apple Disk ][ drive to the Apple //GS ?
The Apple Disk ][ Interface card is installed on Slot 7 on the logic board, the disk drive is connected by cable to the port called "Drive 1" on the card. If you start the Apple //GS, have the "option" key pressed and you get to the Apple //GS control panel. Go to "Slots" by using the arrow keys and click return. On the Slots Screen make sure that the port where you installed the Card (here Slot 7) is set to "Your card". Also set the StartupSlot to "Scan" or "7" if you like to use only Slot 7. After a restart the Apple //GS is booting the APPLE D.O.S. from the Disk ][ drive.
Leave a comment |
To do: |
2.2 Solder a new PRAM battery on the logic board |
08. July 2007 |
Project ID: Solve the Disk Drive problem... |
What I did: |
I found out that the PRAM battery on the logic board is empty. Symptom: All settings from the control panel (click option at startup) are not saved after a restart. When I change the Slot settings in the control panel to Slot1: your Card and Slot 7: APPLE TALK the 3.5 drive is booting the MouseDesk system. Sadly this settings are not saved after a restart due to the empty battery.
Because I have a ROM01 Version with a soldered battery I need to get out the solder iron and dig under the power supply to get the PRAM battery replaced.
 Does anyone ever changed a soldered PRAM battery on an Apple //gs? Anything important to know? Does anyone ever changed a soldered PRAM battery on an Apple //gs? Anything important to know?
Leave a comment |
To do: |
2.1 Install a Disk ][ Interface card & Connect a Disk drive ][
|
08. July 2007 |
Project ID: 2.0 Make a presentation movie |
What I did: |
I made a video to present my black Apple //GS.
The first problem accurse after switching it on - the 3.5 inch disk drive that is added to the disk drive port seems not to work correctly. It gets energy, the red LED flashes, but there is only on SLACK - the disk seems not to rotate and not booting my MouseDesk System that I usually use for my Apple //GS. In the control panel the drive scan is activated.
I have tested 2 disc drives - both where working before so I think it is a deconfiguration or a hardware problem with the Apple //gs.
Presentation Video of my black Apple //GS
Leave a comment |
To do: |
Solve the Disk Drive problem... |
Install Applied Engineering GS RAM Card in my Apple//GS:
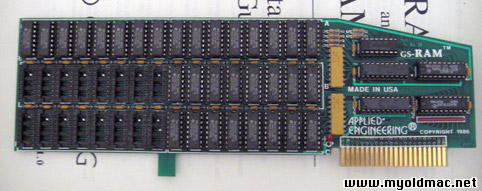
The Applied Engineering GS RAM Card, seems to be unused till now
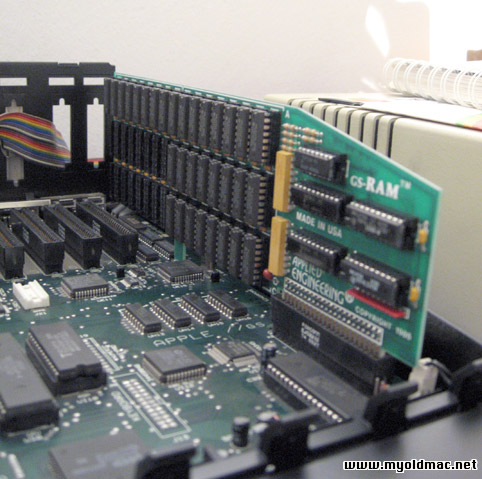
The Applied Engineering GS RAM Card installed in the Apple//GS.
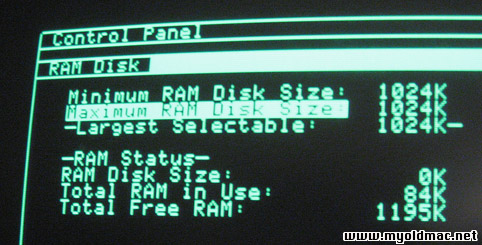
Now my black Apple//GS has 1024 K insanely great byte of RAM.
Install a PRAM Battery on an Apple//gs ROM 01 Board:
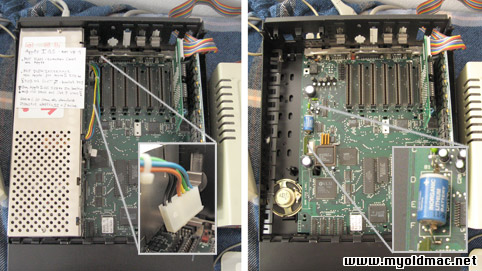
Inside the Apple//GS
On the left you see the LogicBoard with the PowerSupply (PSU). You need to unplug the power cable from the board first to remove the PSU. See the photo bellow how to unplug the PSU. On the right the PSU is removed and you can see the PRAM battery that needs to be replaced. On the PSU you can find a manufacturing date - on my Apple//GS PSU it´s 87/11.
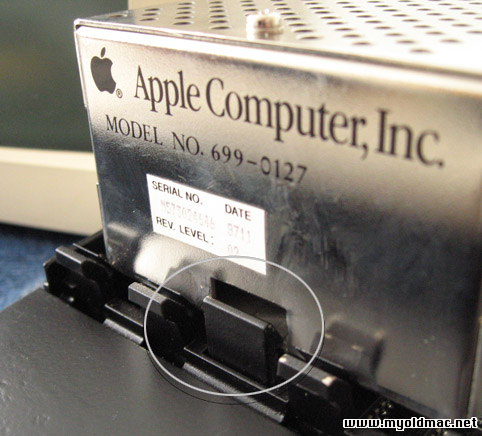
Unplug the PSU by lifting the plastic nose on the front
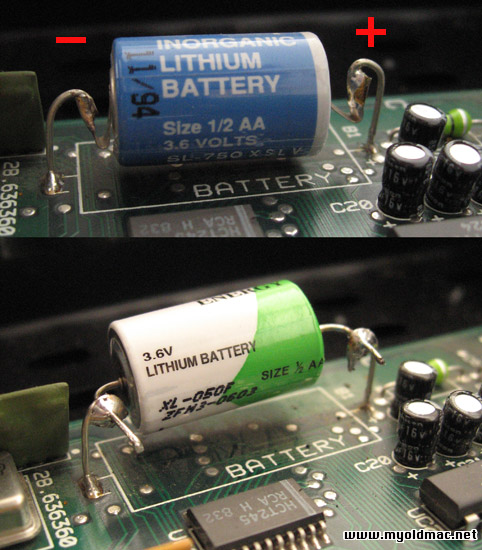
The old and new battery on the Apple //GS Logic Board
The date noted on the original battery marks the estimated end of the batterys life (11/94).
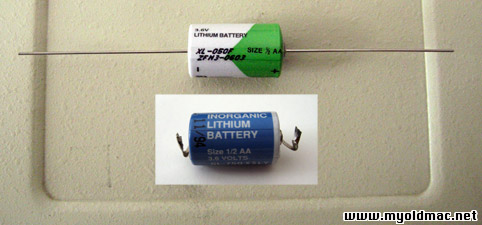
On top you see the new battery with extended metal ends. The blue one is the original Apple //gs PRAM battery - lifetime around 10 years.
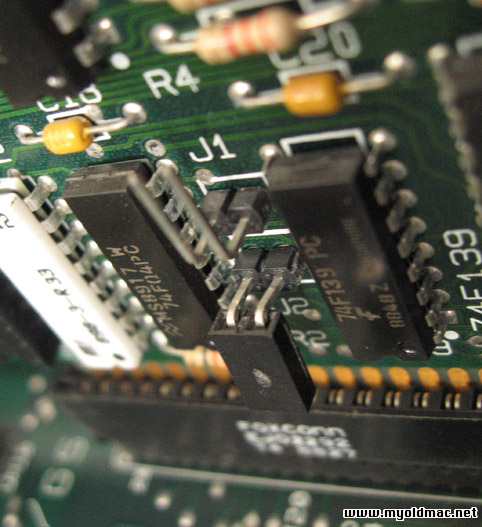
The Jumper on my original APPLE//GS RAM CARD - for what is the Jumper on J1 / J2 ?
|
![]()